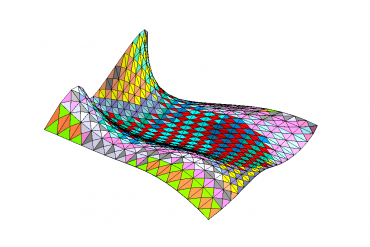
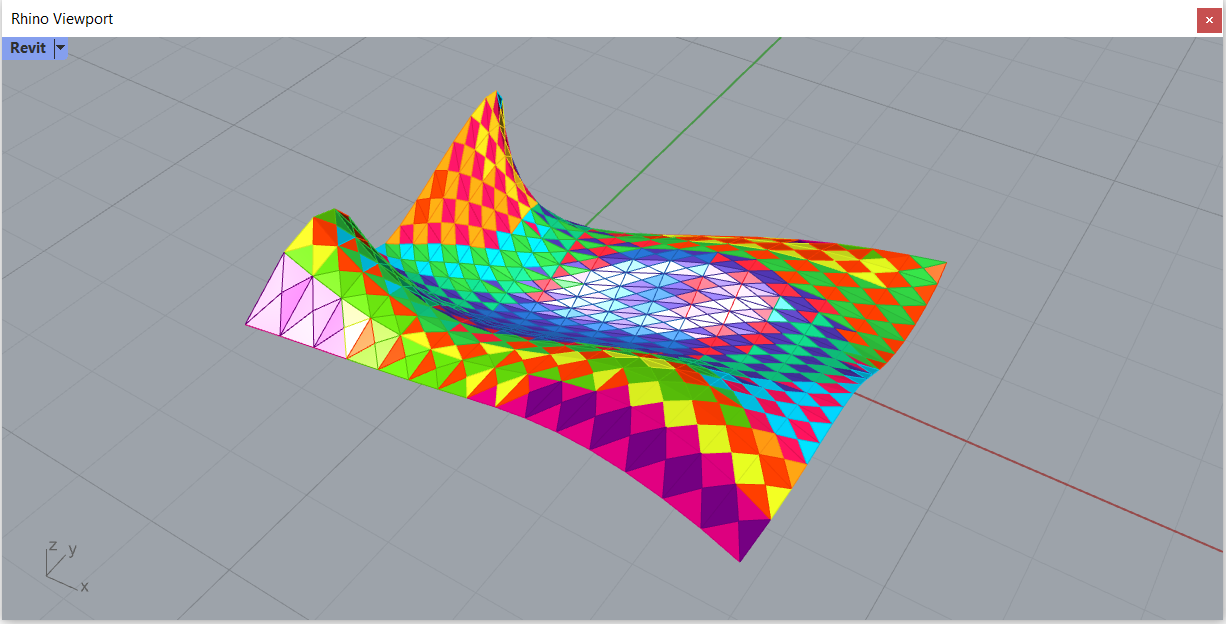
Before Rhino.Inside Revit came to existence, I worked on a project to panel a 5.000m2 surface that would be the facade of a stadium. The client demanded the panels to be modeled in Revit, so the final geometry had to be handed in native Revit geometry. The approach I took was to panel the surface in Grasshopper, optimize the number of panels in GH with Kangaroo and Lunchbox and finally place the panels as adaptive components in a Revit model with Dynamo. Today, I feel lucky that we have a tool like Rhino.Inside Revit allows us to do all the previous workflow within Revit and GH inside Revit. So, let’s have a look at how easy the workflow has become.
Cluster, or group, panels that are similar
After dividing the surface into panels and optimizing their sizes, the next important step is to classify them into groups that are similar. This will allow further optimization with averages or for documentation purposes. The tools to do this are GH and Lunchbox that can be launched from Rhino.Inside.
To install Rhino.Inside, follow the instructions on their official website: https://www.rhino3d.com/inside/revit/1.0/

Something to highlight in this graph is the objectives for the clustering component. Length of edges, angles, and area are some of the parameters that the clustering component can use to classify the panels.
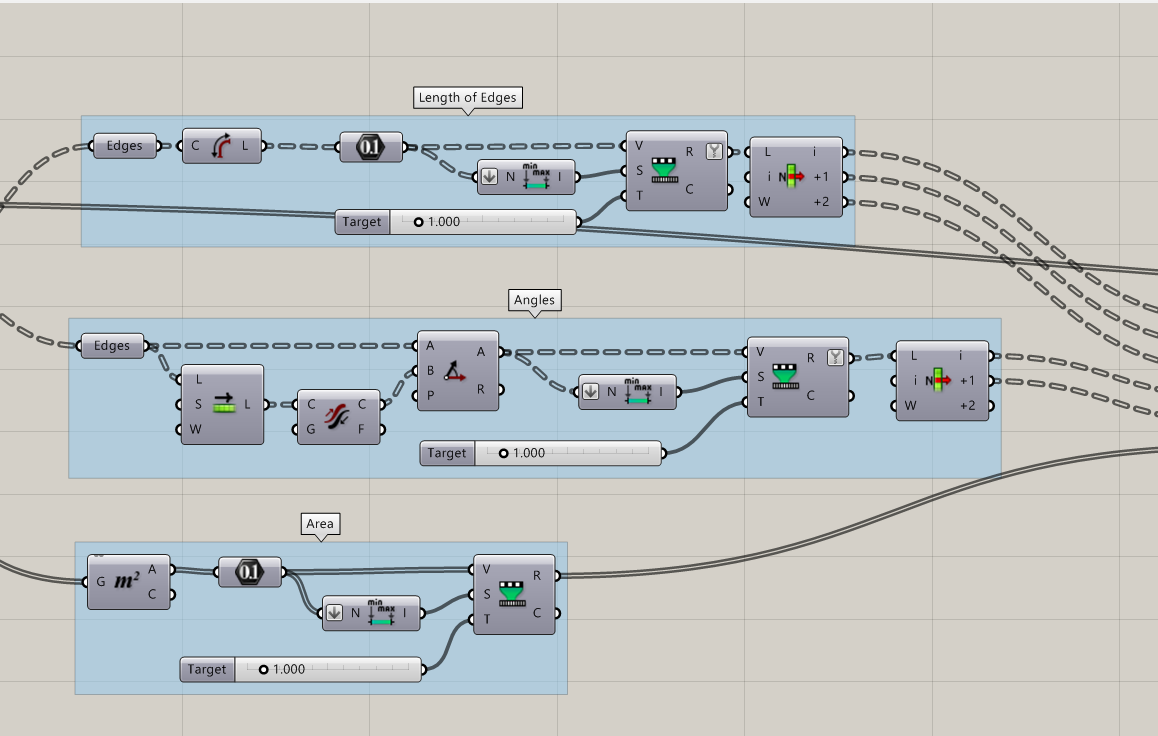
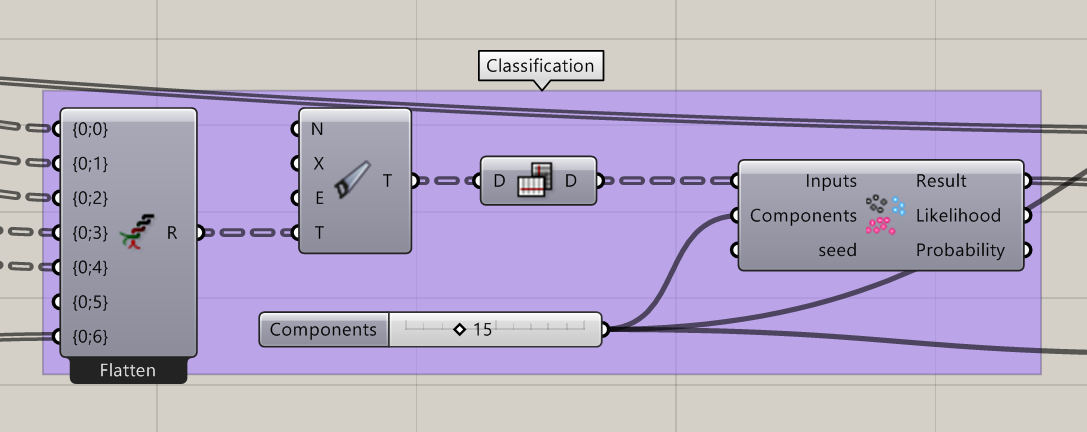
Feeding this matrix to the Gaussian Mixture will return a number for each panel according to the slider Components, which defines the number of groups to divide the panels.
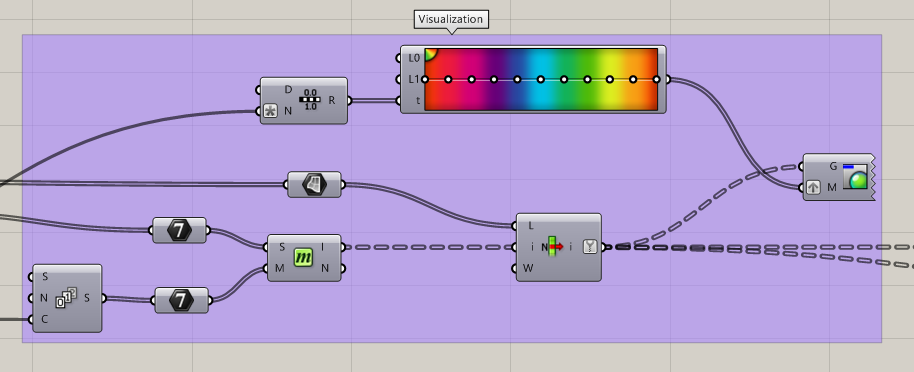
And here is the part to present the clusters in a visual way:
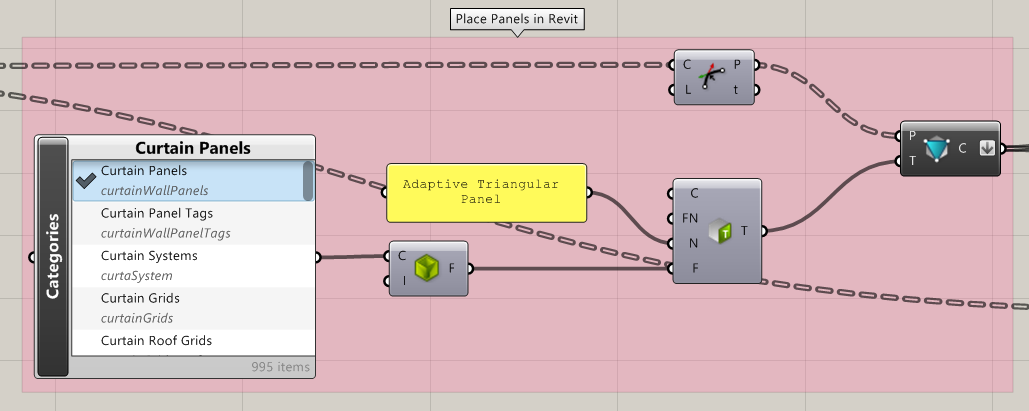
Replicate the panels geometry in Revit
Once we have the classification right, we need to place the panels into Revit. The method I have chosen is to create a loadable family and place that family multiple times inside Revit. In order to avoid a high number of different families, I have created an adaptive component and use it to create instances in the project.
Other methods to incorporate Rhino geometry into Revit are documented in the official Rhino.Inside website:
https://www.rhino3d.com/inside/revit/1.0/guides/rhino-to-revit
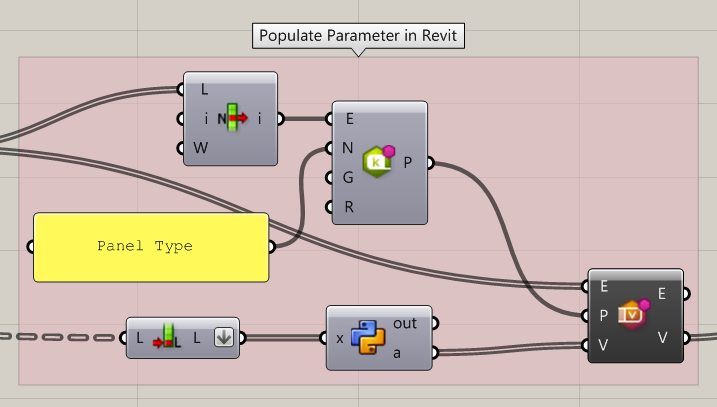
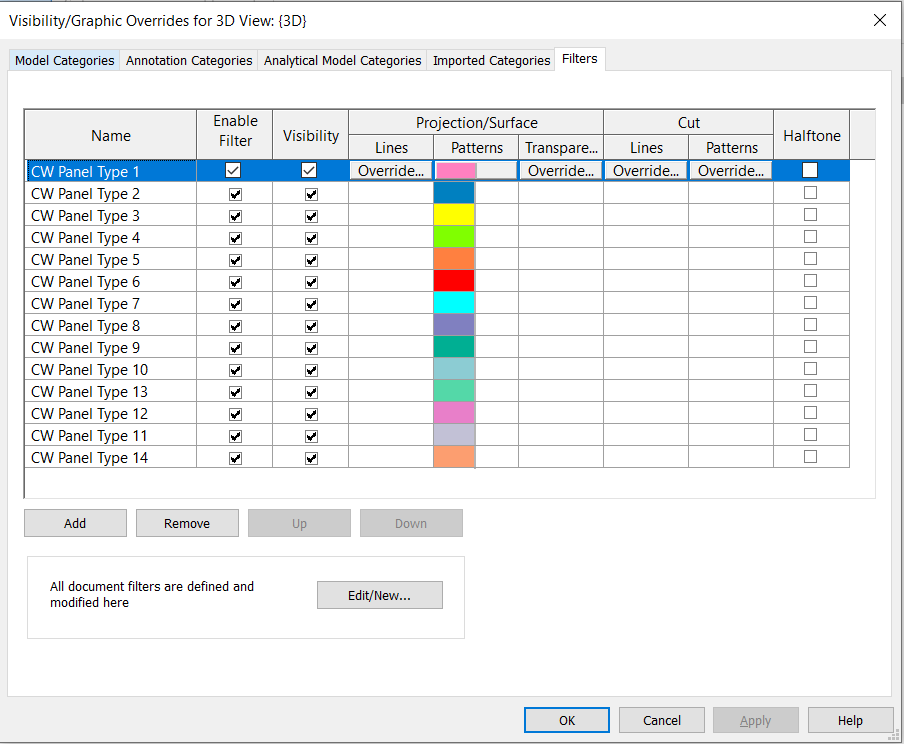
Once the family is created, let’s add a parameter to store what type of panel is each one, to simulate the colors of the clustering in Revit. This can be added to the family or created as a project parameter inside the Revit model.
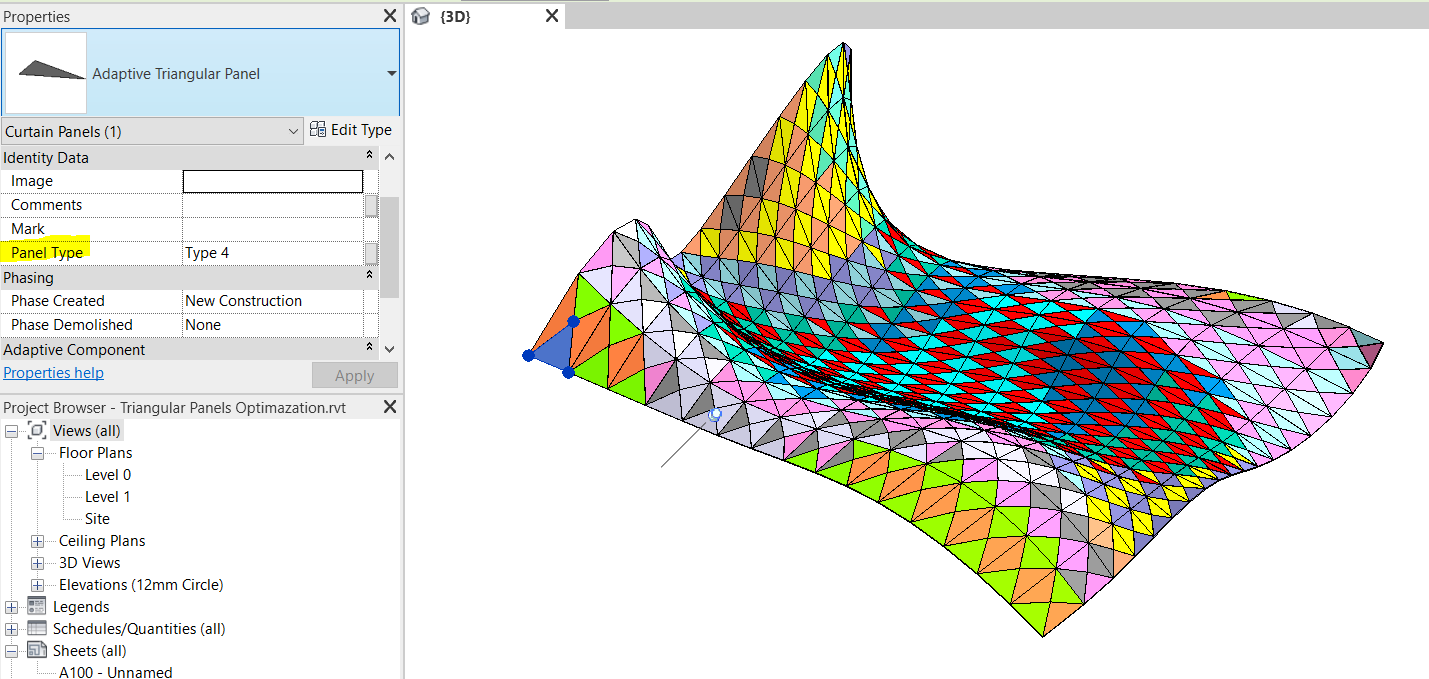
And with some view filters, the panels can be color-coded in Revit:
Download the script below if you want to experiment with Rhino.Inside and surface paneling:
Leave a Reply