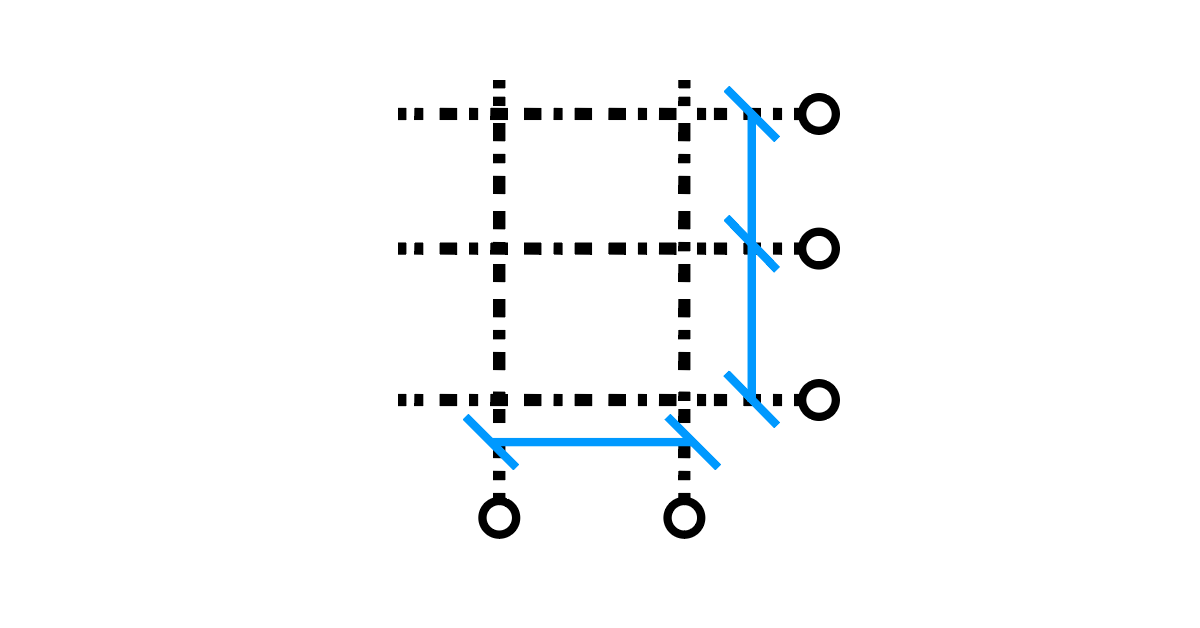
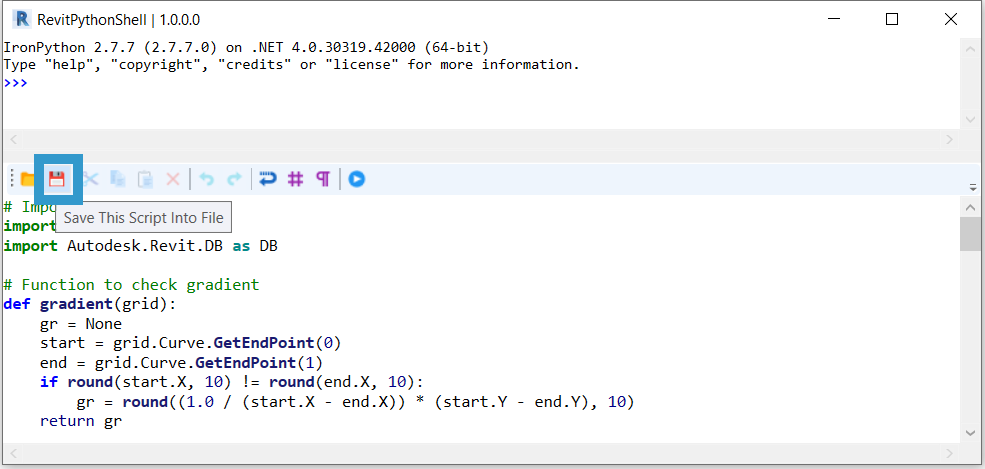
Last time, we programmed a Python script that auto dimensions grids, but it was single-use; after we executed it, we would have to copy-paste or save the file and reopen it in Revit Python Shell again. There is an easy way to overcome this little annoyance with Python scripts, and that is pyRevit.
One of the advantages I mentioned in my previous post about pyRevit is its customization capabilities. pyRevit allows us to create a customized toolbar, and in this post, we will see how this can be achieved. And best of all, no code compilation involved, chunks of code can be tested right away.
To get it started, you need to install pyRevit if you haven’t done it yet, which is the platform from where we will load the scripts.
How to set up a Revit Tab
After the installation, we need to create a folder with the following subfolders:
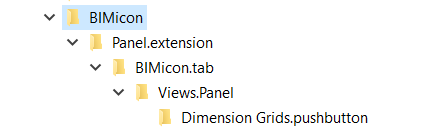
BIMicon – you don’t need this one, I just use it as the main folder for every project associated with BIMicon. The following folders inside must be named with . (dot) plus the extensions of the folders, otherwise pyRevit won’t load them.
Panel.extension – This folder must be named as it is.
BIMicon.tab – This folder name is the name of the toolbar loaded in the ribbon. inside Revit.
Views.Panel – The name of this folder will be displayed as the name of the group of tools, like Build or Opening inside Revit. All the tools must be contained in folders prefixed with ‘.Panel’ if you want them to be in the same group.
Dimension Grids.pushbutton – This folder contains the script and the name of the folder will be the name of the button shown in the ribbon if not changed inside in the script as we are going to see later.
Inside this ‘.pushbutton’ folder there are two elements with names set by the following rules:

- icon.png – the image of the button in the toolbar, must be in png and a size of 32 x 32 pixels is the optimal resolution.
- script.py – the script that will be run when the button is pressed. The name can be prefixed with other words to differentiate between scripts, but it must end with ‘_script.py’.
For this script, we are going to save the auto dimension grids script as Dimension Grids_script.py inside the Dimension Grids.pushbutton. This is the name that will show inside Revit if we don’t change it inside the script.
Afterward, we need to edit the script to change the import statements and a few elements specific to pyRevit. For this purpose, I would suggest installing Visual Studio Code, but any code editor is good, only I have this preference.
The first thing we need to change from our script is to get ride of the import statements. pyRevit has its own way to handle it and we have to add these lines:
# -*- coding: utf-8 -*-
"""Auto dimension grids.

NOTE: Dimension all parallel grids in active view.
"""
__title__ = 'Dimension\nGrids'
__author__ = "BIMicon"

# Import
from pyrevit import DB

# Store current document into variable
doc = __revit__.ActiveUIDocument.Document
Line 1: defines the encoding of the script, it may save you some headaches due to unrecognized characters in the script.
Lines 2-5: this message will show if we leave the mouse over the tool in Revit.
Lines 6: displays the name of the script in the ribbon. If you want a line break in the title, this is the way to go with the ‘\n’ (line break).
Line 7: shows the author in the tooltip, after you hover with the mouse over the tool.
Line 8: imports Revit API. As you can see, in pyRevit the API is wrapped in pyRevit. Nothing different than accessing Revit’s API through import Autodesk.Revit.DB.
Line 13: declare the current document explicitly, as in Revit Python Shell that is managed by the shell itself.
You can download the changed script in here:
The final step is to tell pyRevit where is the location of our new folder to load customized scripts. To do so, go to the pyRevit tab, expand pyRevit and Settings:

Inside Settings, under Custom Extension Directories, click Add Folder and select the location of your new created folder with all the subfolders:
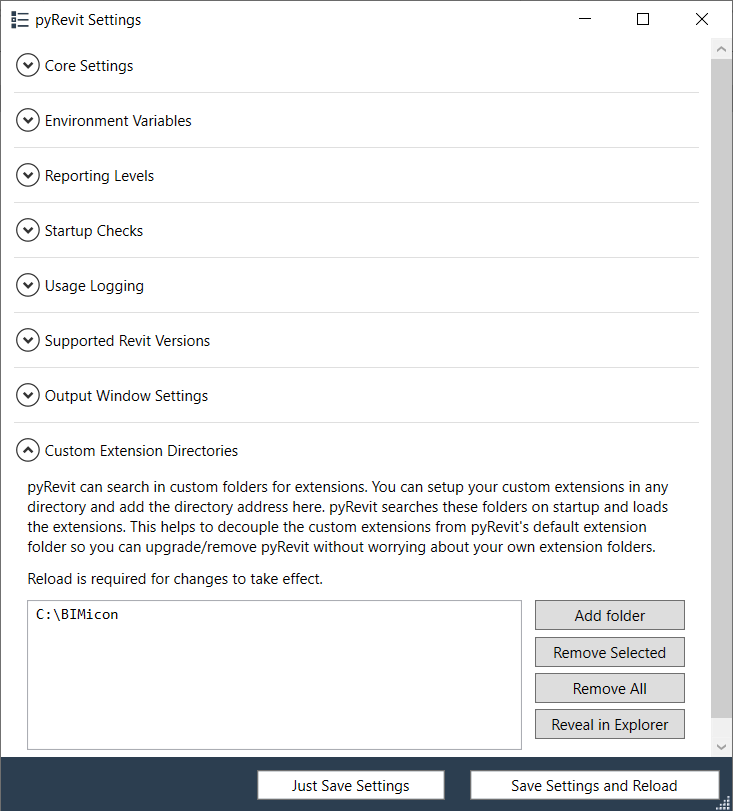
Click Save Setting and Reload and you will have your first customized Revit tab with Python scripts!

As a final thought, if you find daunting to get into C# and Visual Studio to deal with libraries and compiling code, this is the hustle free way to get your own customized toolbar.
Leave a Reply