Today’s post is about dimensions and grids. Dimensions are an essential part of any drawing, and there is no complete documentation if there are no dimensions specifying openings, thicknesses, clearances and so on. This quintessential element of any technical drawing can be tedious to deal with, it is highly time-consuming but not much rewarding.
Dimensioning grids in every view was even easier with CAD drawings, with a common link with the dimensioned grids for each plan to print, right? Well, not true, placing dimensions in every view can be a tedious task but we can automate it! So here goes this Python script:
# Import
import clr
import Autodesk.Revit.DB as DB

# Function to check gradient
def gradient(grid):
	gr = None
	start = grid.Curve.GetEndPoint(0)
	end = grid.Curve.GetEndPoint(1)
	if round(start.X, 10) != round(end.X, 10):
		gr = round((1.0 / (start.X - end.X)) * (start.Y - end.Y), 10)
	return gr

# Function to check if lines are parallel
def parallel(gridA, gridB):
	return gradient(gridA) == gradient(gridB)

# Function to create ReferenceArray
def refArray(listConv):
	refArray = DB.ReferenceArray()
	for e in listConv:
		refArray.Append(DB.Reference(e))
	return refArray

# Function to create reference line for dimension
def refLine(grids):
	start = grids[0].Curve.GetEndPoint(0)
	end = grids[1].Curve.GetEndPoint(0)
	line = DB.Line.CreateBound(start, end)
	return line

# Get current view
view = doc.ActiveView

# Select all grids by filter
gridsFilter = DB.ElementCategoryFilter(DB.BuiltInCategory.OST_Grids)
gridsCollector = DB.FilteredElementCollector(doc).WherePasses(gridsFilter).WhereElementIsNotElementType()

# Convert gridsCollector into list and split them into parallel groups
grids = list(gridsCollector)
gridGroups = {}
excludedGrids = []
# Loop through all grids
for grid in grids:
	gridName = grid.LookupParameter("Name").AsString()
	gridCurve = grid.Curve
	# Check if grid is already classified
	if gridName not in excludedGrids:
		# Check if the rest of the grids are parallel
		for g in grids:
			inter = gridCurve.Intersect(g.Curve)
			gName = g.LookupParameter("Name").AsString()
			# Check parallel grids and group them
			if gName not in excludedGrids and inter == DB.SetComparisonResult.Disjoint and parallel(grid, g):
				if gridName not in gridGroups.keys():
					gridGroups[gridName] = [grid]
					excludedGrids.append(gridName)
				gridGroups[gridName].append(g)
				excludedGrids.append(gName)

# Create transaction to create dimensions
t = DB.Transaction(doc, "Dimension grids")
t.Start()

for k in gridGroups.keys():
	lt = gridGroups[k]
	line = refLine(lt)
	ref = refArray(lt)
	try:
		# Create dimensions
		doc.Create.NewDimension(view, line, ref)
	except:
		pass

# Commit transaction
t.Commit()
Lines 1-3: import the clr and the Revit API.
Lines 5-11: function to calculate the gradient of the grid. First, it checks that the endpoint and start point values are different, so the grid’s underlying curve is not vertical. Then it returns the calculated gradient.
Lines 14-16: function to check grids are parallel by comparing their gradients.
Lines 18-23: function to create a ReferenceArray to store the grids to pass to the dimension Create method.
Lines 25-30: function to create lines to pass to the dimension Create method.
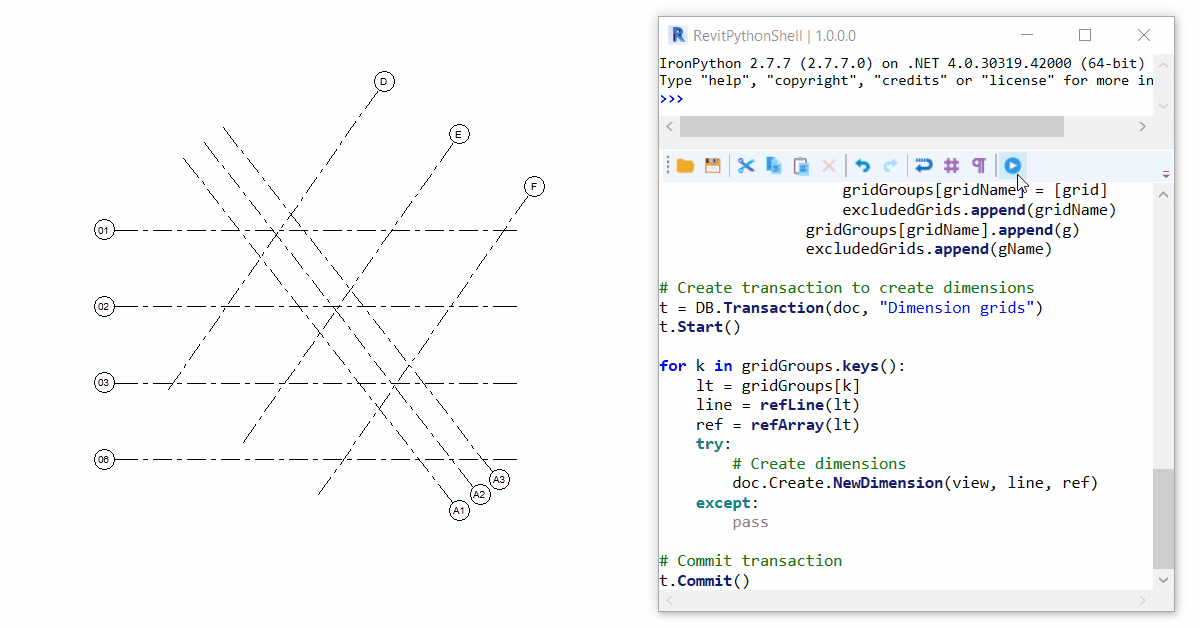
Lines 32-33: retrieve the currently active view to dimension grids. These lines of code can be changed to select all the views where grids have to be dimensioned.
Lines 35-37: collect all grids in the project.
Lines 39-59: the logic here is to classify the grids and group the parallel grids so we can later dimension all the ones that are parallel.
- We start by converting the elements in the FilteredElementCollector into a list.
- Create a dictionary to classify the grids and a list of excluded grids.
- Loop through the grids and check for the parallel condition with the gradient() and parallel() functions.
Lines 61-63: Create a transaction and start it.
Lines 65-73: Loop through the keys of the dictionary and create dimensions for the values in the dictionary, that is grids.
Lines 75-76: Commit transaction.
I hope you find this one fun and useful!
DEVELOPMENT IDEA:
- The offset of the dimensions from the endpoint. Once we get the endpoints we can move them to create the dimension anywhere it suits us. We just need to create the line in the place we want the dimension, it can be offset a certain distance from the grid by checking the length of the underlying curve of the grid.
- This script dimensions one view only, but it can be extended to as many as you like. We just need to select the views we want to dimension first, like all the views on sheets, and to create an exterior loop for views before going into the grids.
Leave a Reply