Revit macros are helpful tools that allow you to deal with repetitive tasks by automating them. So why don’t we use Dynamo or pyRevit for that purpose? Well, it is the intermediate step to develop your own plugins for Revit or Zero Touch nodes for Dynamo. Before you jump straight into the development pool, macros are the perfect way to test the waters.
So, let’s get started. What I propose to do first is to create a simple macro that allows users to select a Revit element, in this case, a model line.
Revit macro to select Model or Detail Lines
To start the macro creation, we need to go to Manage > Macro Manager. The following window will open:
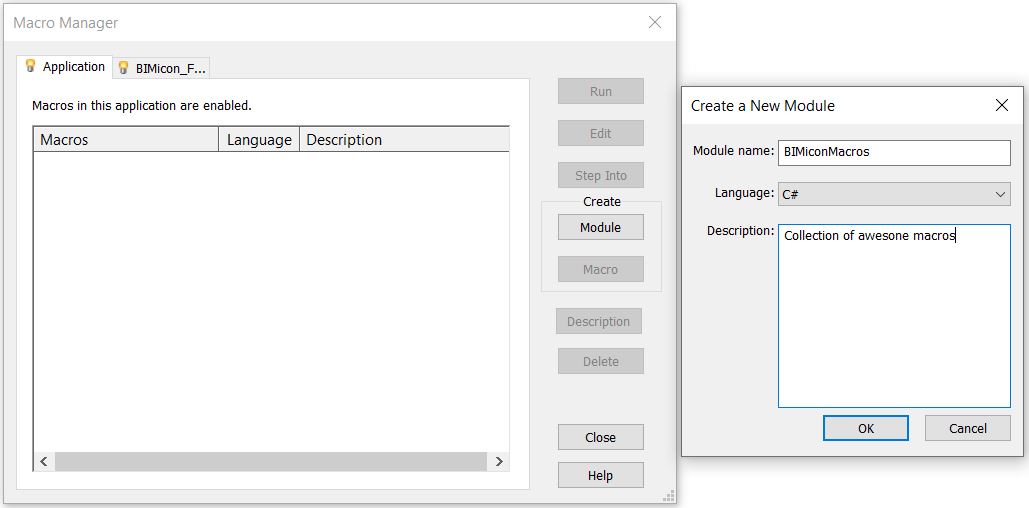
There are two tabs, the Application and the Document tab. We are going to use the Application tab, in this way the macros will be available across all Revit projects that are opened with this Revit version while creating macros in the document will only allow the use of this macro in the document in which it was created.
Once we click OK, SharpDevelop will open:
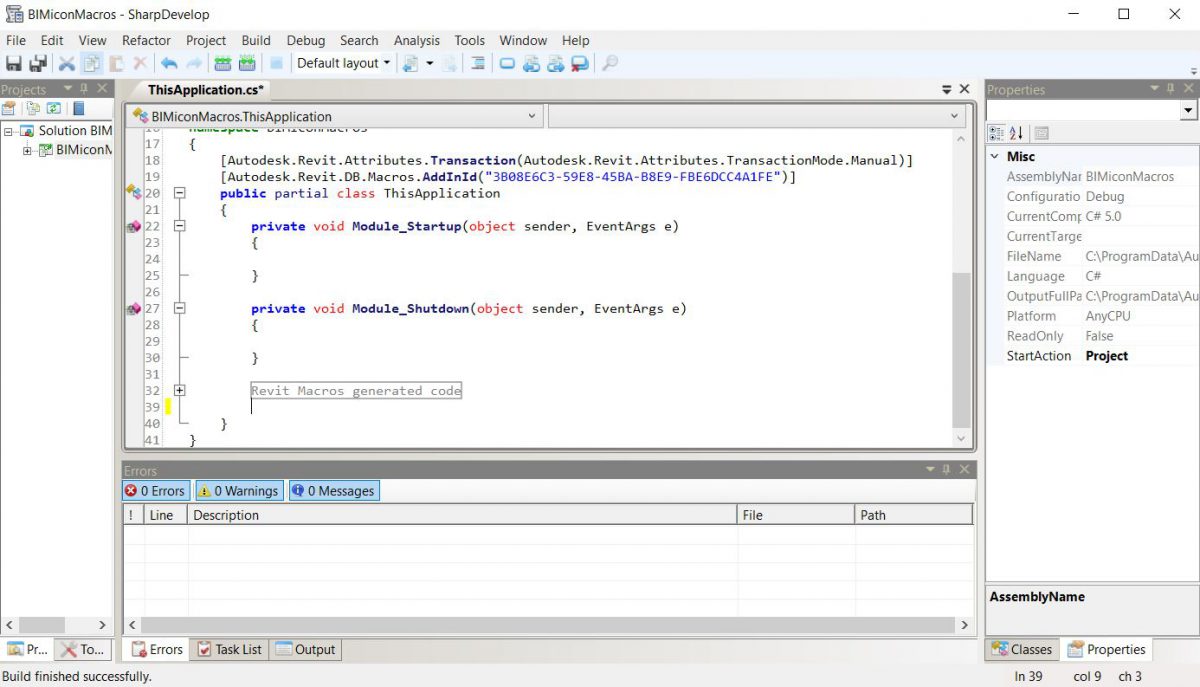
We are putting our code after the line Revit Macros generated code:
		public void PickLine()
		{
		    // Store current document in variable
		    UIDocument uidoc = this.ActiveUIDocument;
			Document doc = uidoc.Document;

		    // Selection filter
		    ISelectionFilter selFilter = new LineSelectionFilter();

		    try
		    {
		    	// Prompt user to select curve that intersects with rooms
			    ElementId curveId = uidoc.Selection.PickObject(ObjectType.Element, selFilter).ElementId;

			    // Retrieve model curve
			    Element curve = doc.GetElement(curveId);

			    TaskDialog.Show("Curve Picked", curve.Name);
		    }
		    catch(Autodesk.Revit.Exceptions.OperationCanceledException e)
		    {
		    	TaskDialog.Show("Operation Canceled", e.Message);
		    }
		}

		// Define filter to pick model detail splines
		public class LineSelectionFilter : ISelectionFilter
		{
		    public bool AllowElement(Element element)
		    {
		        if (element.Category.Name == "Lines")
		        {
		            return true;
		        }
		        return false;
		    }
		    // Overrride AllowReference method
		    public bool AllowReference(Reference refer, XYZ point)
		    {
		        return false;
		    }
		}
Code explanation
Line 1: declares a class to pick up lines in the Revit model.
Lines 4-5: declares the current active document in the application.
In case the macro is a document level macro, you will have to check this section:
Difference between Application and Document.
In brief, the main difference is that the Application can refer to several open Revit sessions with several documents, while the Document refers to a single document.
So, in case you use a Document macro, the way to declare the doc variable is like this:
Document doc = this.Application.ActiveUIDocument.Document;
Otherwise is as in the example:
Document doc = this.ActiveUIDocument.Document;
Line and lines 27-42: creates a new instance of the Interface ISelectionFilter that only allows the selection of Model Lines or Detail Lines.
The Interface documentation can be found here, ISelectionFilter.
Lines 10-24: wrap the call for user selection into a try catch statements that will pick possible errors in the execution of this part of code. The catch statement will show a message that the user cancelled the operation instead of Revit warning of an error.
This was easy, wasn’t it? In the next posts, I will show you the applications of using this macro, like renaming rooms or parking spaces.
Leave a Reply